Finden und Katalogisieren von content mittels
eines einfachen Photogalerie-Scriptes /Finding and cataloging content
with a simple
photogalerie-script
(Ein Beispiel mit Gebäuden / Example with buildings)
Attention: you need
webspace for doing this. Achtung: Du brauchst etwas Webspace
dafür.
Kennst du das Problem auch, dass du ein tolles Gebäude hast,
welches du gerade für eine bestimmte Szene brauchst, aber du
hast keine Ahnung, wo in dem Content-Wirr-warr es gerade versteckt ist?
Do you know the problem that you have a wonderful building you want to
use in the current scene, but you can't find it in your content-chaos?
Das war für mich auch lange Zeit ein Problem, aber jetzt nutze
ich folgende Methode, die mir die Übersicht erleichtert:
This was really a great problem for me a longer time, but now i am
using the following method for getting a better overview:
Zuerst lade das Script hier down (rechte Maustaste und dann "Ziel
speichern unter ...").
First load down the script here (use right mouse-button and "save file
as ...").
Php-Script Download
Es ist nicht perfekt, aber
erfüllt seinen Zweck.
It's not perfect, but it works.
Wenn du dich mit php auskennst, kannst du es leicht anpassen. Vor allem in den Zeilen 5 und 6:
If you are a friend of php you can adjust some settings easyly in lines 5 and 6:
$spalten = 5; // means rows
$zeilen = 3; // means lines
Was du nun tun musst:
What you have to do:
-
Speichere das Script in einem Ordner im Internet, auf den du Zugriff
hast. Es kann auch ein beliebiger Unterordner sein, hauptsache, du
kommst per http://www... ran
Save the script in a folder of your webspace. It is not
important where the folder is. It can be a subfolder where you want to
have it. Important is only that you can reach it with http://www....
- Erstelle Renders im Format 800 x 600 Pixel. Die Render
müssen
nicht perfekt sein, aber der Ausschnitt sollte so gewählt
sein, dass du noch Text auf der späteren Grafik entweder oben
oder unten einfügen kannst.
Make a render with size 800 x 600 Pixel. The render doesn't
need to be perfect, but it is important that you can add a description
either on the top or bottom of the image .
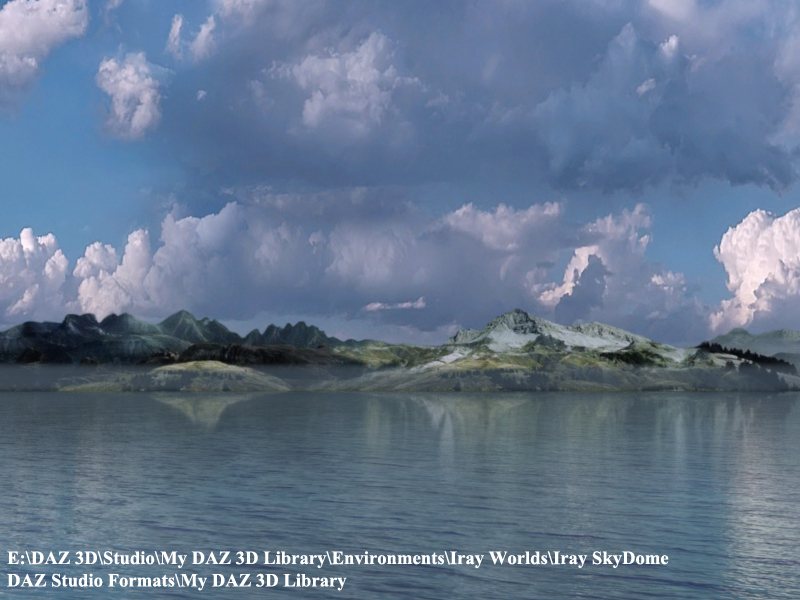
- Bearbeite den erstellten Render in einem
Grafikprogramm deiner Wahl und schreibe folgendes drauf:
Edit the render in a graphic program you like and add the
following descriptions:
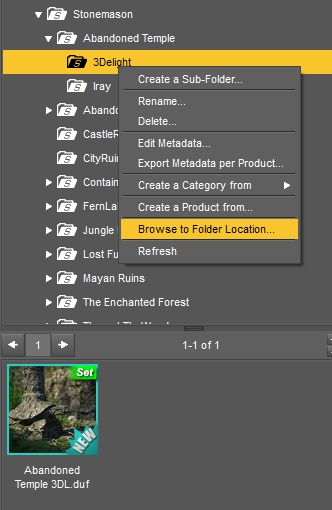
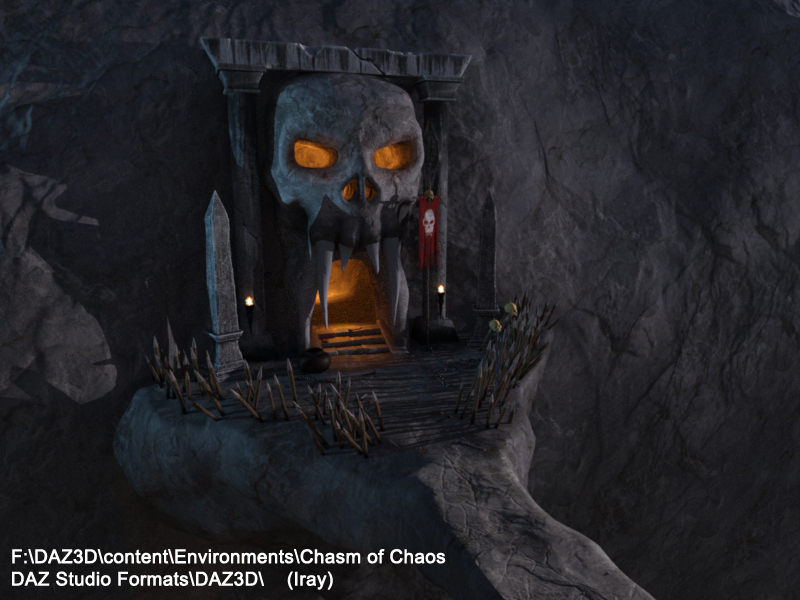
- Den Pfad auf der Festplatte. Du bekommst ihn, wenn du im
content-tab das Item mit der Maus markierst, rechte Maustaste
drückst und dann "Browse to Folder Location" wählst:
- The path of the harddisk. You can get it by selecting the item in the
content-panel, right-mouse-click, "Browse to Folder Location":
/
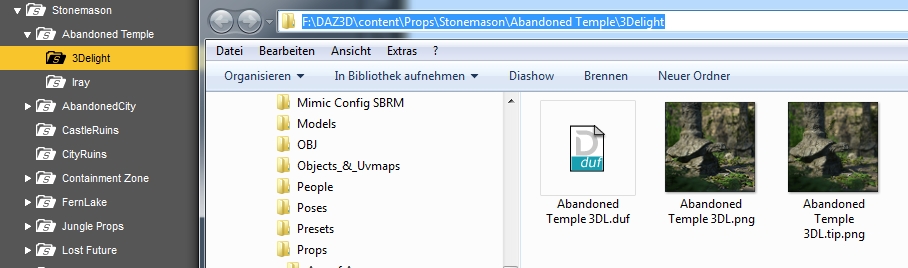
- Kopiere den Pfad im Explorer: / Copy the path the explorer shows:
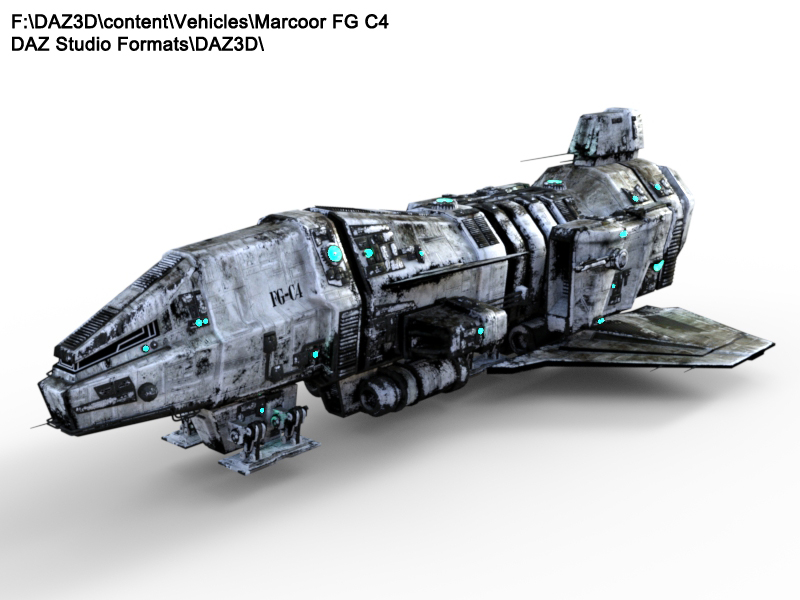
- Das nächste was du dir noch
aufschreiben solltest, ist der DAZ-Pfad,
also wo du die Datei im content-tab findest
- next thing you should notice is the DAZ-Path, where you
find the item in the content-tab.
Da ist oft ein Unterschied zwischen dem Dateipfad und wie DAZ ihn
anzeigt:
There is often a difference between the harddisk-path and the content -
path.
Ich machte mir eine Liste meiner Content-Directories auf folgende Weise:
I made a list for the content-directories on my computer like this:
DAZ Studio Formats\DAZ3D\
F:
Poser Formats\DAZ3D\
F:
Poser Formats\My DAZ 3D Library\
E:
DAZ Studio Formats\My DAZ 3D Library E:
Das ist so, weil ich DAZ schon seit version 3 nutze und daher mehrere
Verzeichnisse habe. Der Ordner, der früher "content"
hieß, ist jetzt ja "My DAZ 3D Library".
Möglicherweise hast du nur 1 Content-Verzeichnis.
Dann ist "DAZ Studio
Formats\My DAZ 3D Library" genug.
This is because i use DAZ since version 3 and there was a DAZ-Folder
named "content" which is currently "My DAZ 3D Library". Maybe you
have only 1 conent-folder, so "DAZ Studio Formats\My DAZ 3D
Library" may be enough.
-
Du kannst natürlich eine Bezeichnung wählen, die
für dich sinnvoller ist. Das hier ist nur ein Beispiel, wie
ich es mache. Meine Bilder sehen dann so aus:
Feel free to create your own descripiton-system. My images
now are looking like these:
Folgendes solltest du beachten:
You should notice the following steps:
-
schreibe alle Dateinamen in Kleinbuchstaben, da die Suche und Anzeige
Case-sensitive sind
write all filenames in lower-letters because the search is
case-sensitive
-
Schreibe Gruppenzugehörigkeiten und Dinge, nach denen du
voraussichtlich suchen wirst, in den Dateienamen:
"desert_temple_ruins_iray.jpg" oder z.B. "west_park", dann findest du hier mit "park" alle West-und East-Park-Sachen.
Write groupnames and things you want to search for in the
grafik-file-name "desert_temple_ruins.jpg" or "west_park". So you can find with "park" all west- and east-park-things.
- Die Suche ist nur für jpg-Dateien ausgerichtet, nicht für png oder anderes
The search works onyl with jpg, not with png or other formats
- Da ist noch ein Sonderfall: Manchmal findet die Suche nichts, obwohl etwas sicher da ist. Aus diesem Grunde fängt die Zählung in der oberen Leiste bei 0 und nicht bei 1 an. Keine Ahnung, warum das so ist.
There is a special case you should know: Sometimes the search-function finds nothing, but there is anything! Because of this the numbering in the top-line starts at "0" and not at "1". I don't know the reason of this problem.
Jetzt muss ich bei neuem Content "nur noch" die Grafik erstellen,
beschreiben und auf den Server laden. Das Script macht den Rest.
When i have new content, i have "only" to create the graphics now,
describe them and load them in the folder on the server. The script
does the rest.
Back / Zurück
Impressum