Creating a facemap with Faceshop - Gesichter mit Faceshop erstellen.
You need DAZStudio (Version 4.X) and Faceshop (FS), but i
can't
find Faceshop (8) in the DAZ-Store any more at the moment. I hope that the author
will work on a new version ;-)
Ich arbeite hier mit Faceshop (8), aber es gibt inzwischen den Headshop, der etwas umfassender ist.
First we need a pic of a good face. Zuerst brauchen wir ein gutes Gesicht.
the following is important. Folgende Punkte sind wichtig:
- no shadows in the face and no different lightzones - keine Schatten im Gesicht und keine unterschiedlich hellen Seiten
- correct lightning (daylight), no false colors - Tageslicht. Keine falschen Farben wie Scheinwerfer.
- no hair in the face. Keine übers Gesicht hängenden Haare.
- no glasses or things like cigarr. Keine Gläser oder Zigarretten im oder am Mund .
- large. Groß sollte das Bild sein. Keine Kleinstaufnahmen. Min 600 x 600.
- good is when the person has long hear (on the sides, not in the face) and even a beard may
be good if the beard is compatible with a "DAZ-beard"
Gut ist es wenn die Person in Natura langes Haar (auf den Seiten, nicht
im Gesicht) hat oder wenn die Person einen Bart hat - sofern der mit
einem Daz - Bart für (M4) kompatibel ist.
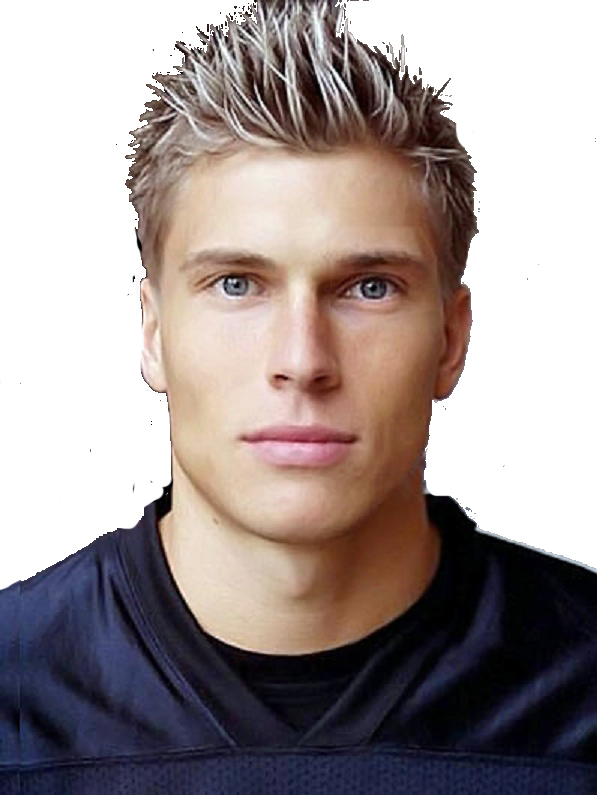
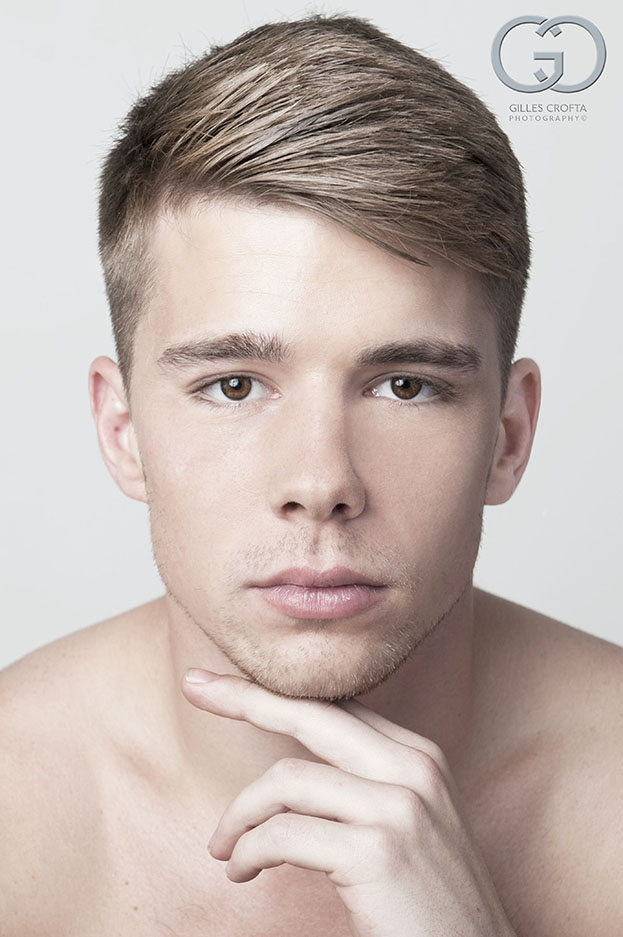
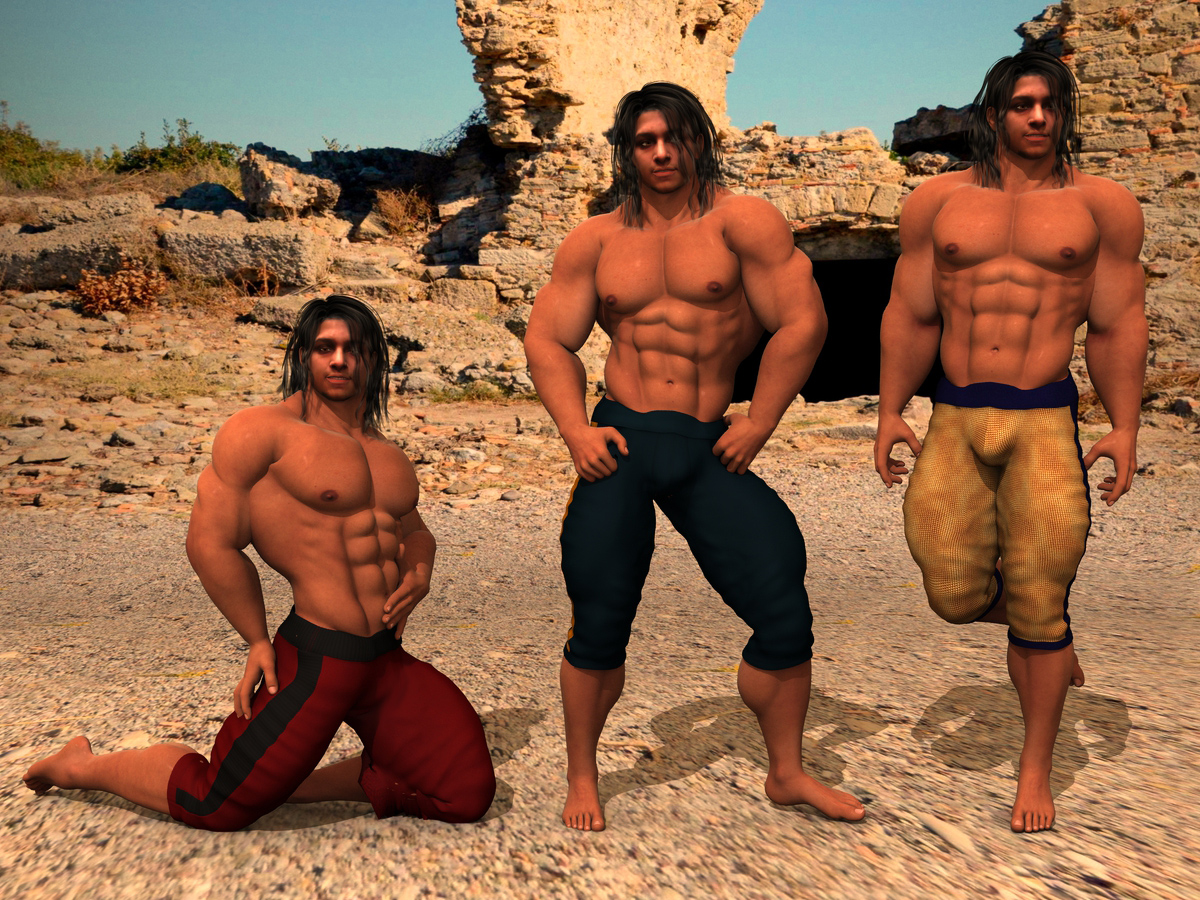
here some examples that will work: Diese Beispiele können
funktionieren, wobei das linke und rechte etwas problematisch sind
wegen dem Licht.
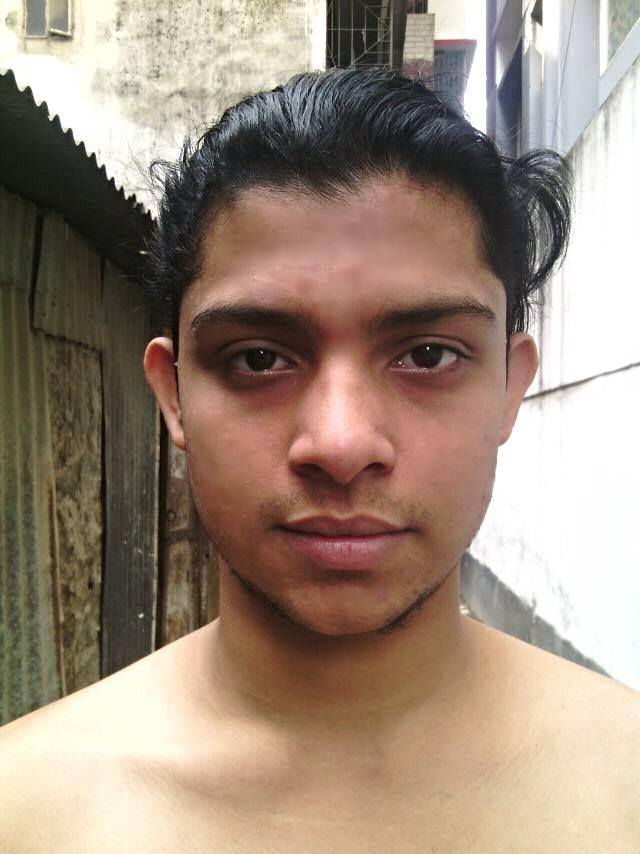
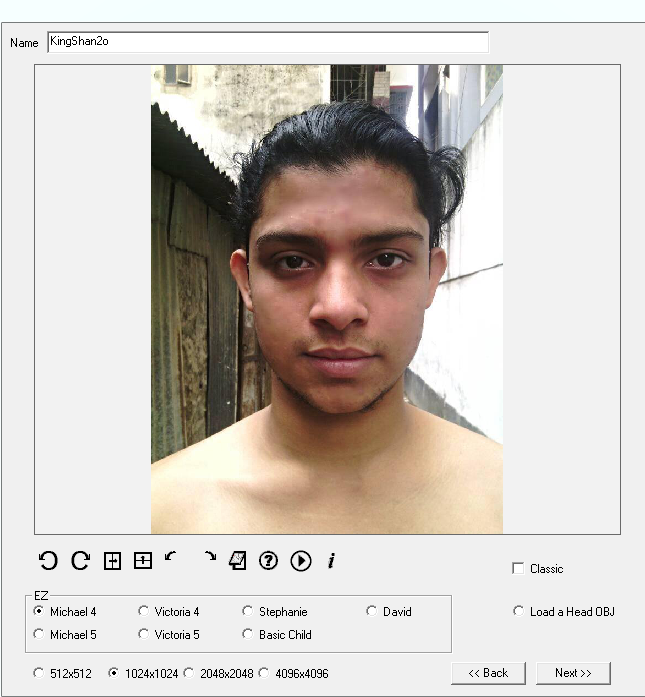
I take the last one, because it seems to be the best here and he is a personal friend, "King Shan".
Ich nehme hier das letzte, weil es das beste hier zu sein scheint und es sich um einen persönlichen Freund handelt.
It is not neccessary to remove the background.
Es ist nicht nötig den Hintergrund zu entfernen.
The first 2 pics may cause a little problem because of the shadows on
their left cheek.
Die beiden ersten Bilder (vor allem das erste) könnten wegen den Schatten im Gesicht problematisch sein.
Best is if you have an image of a face, that is made in a photostudio.
Das Beste wäre, wenn du ein Bild von einem Gesicht hast, das in einem Fotostudio gemacht wurde, aber das ist selten.
So lets call Faceshop. Because of a strange problem FS doesn't run in
DS4.X on my computer correcct,
i will call the exe - file direct from the DAZ-Plugin-folder, on my
computer at C:\Program Files\DAZ 3D\DAZStudio4\bin
Weil das Faceshop-Plugin bei mir in DAZ irgendwie nicht richtig laufen
will, rufe ich die Exe-Datei direkt von Hand auf. Funktioniert auch.
Sie ist im DAZ-Plugin-Folder.
First you have to select and load the face-image you want to work with:
Als erstes muss man ein geeignetes Gesicht-Bild laden:

Then FS want's to know for which figure it is. I choose here M4 and a
size of 1024 x 1024.
FS will wissen für welche Figur das ist. Ich wähle hier M4 mit einer Größe von 1024 x 1024.
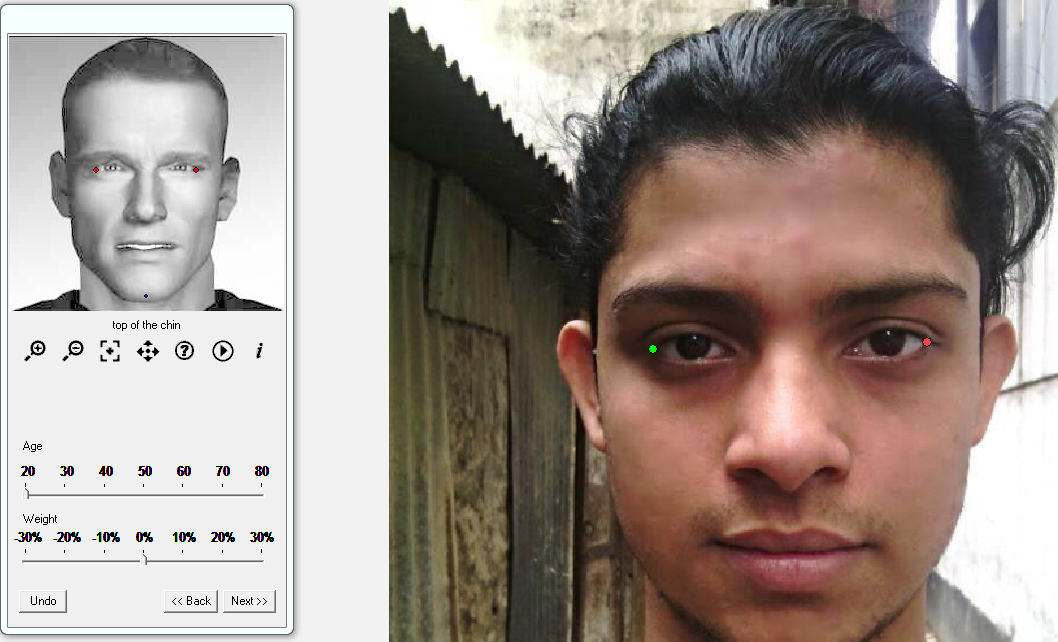
After loading FS wants to know the first 3 important points: left eye,
right eye and chin.
Dann will FS die 3 ersten wichtigen Punkte wisssen: Auge links und
rechts und Kinn. Diese bitte im echten Bild richtig anbringen.
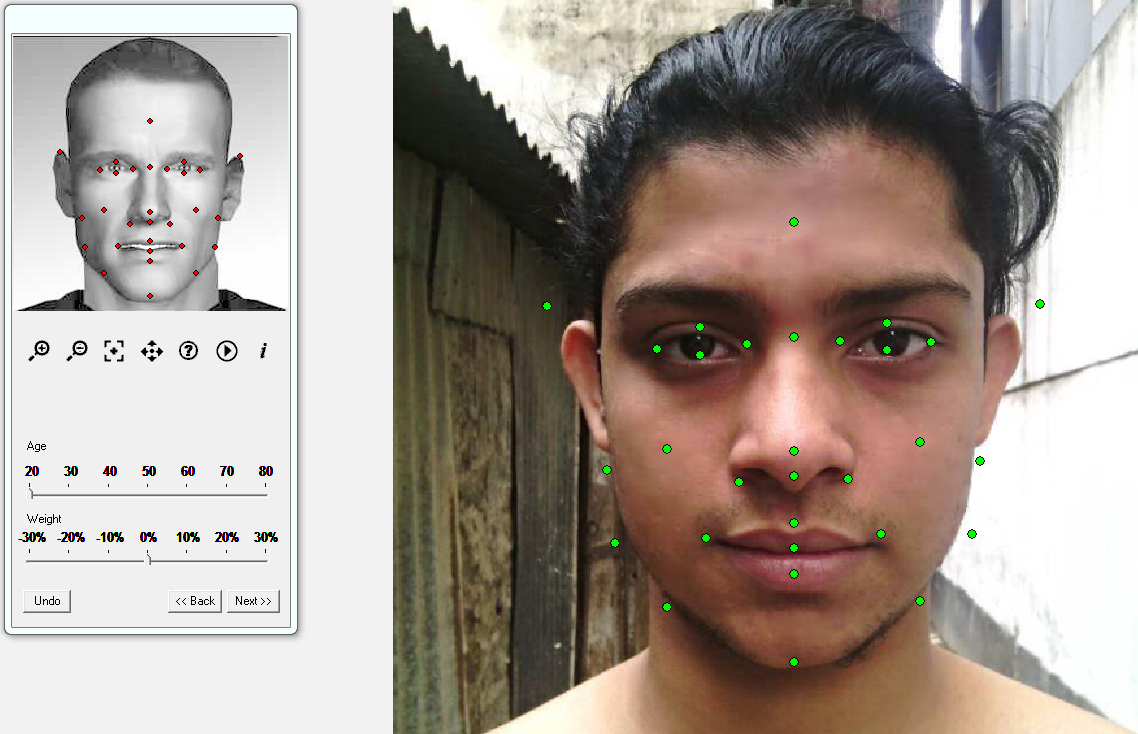
Clicking on next shows the mask where you have to adjust a lot of other
points.You don't need to adjust them 100% correct but you should do it
so good as possible.
You have to do the main thing in postwork later.
Bei "next" kommen dann die restlichen Punkte. Diese sollten so genau
wie möglich platziert werden. Fehler werden später im
Postwork ausgebügelt.
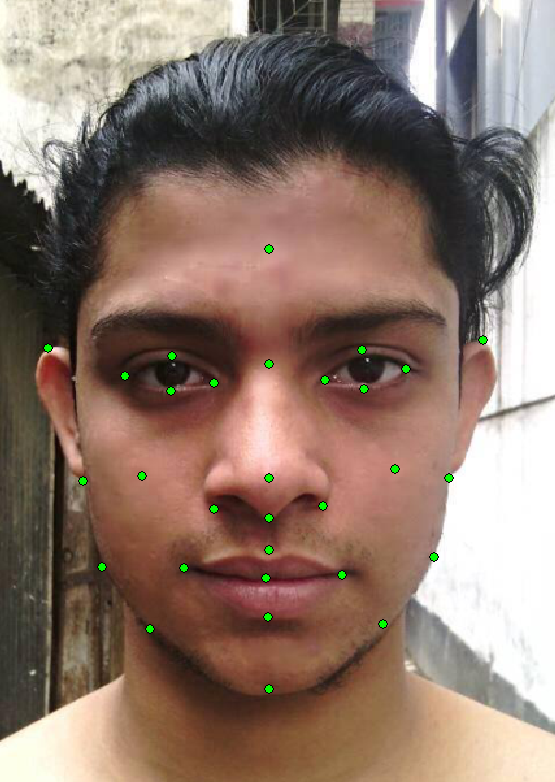
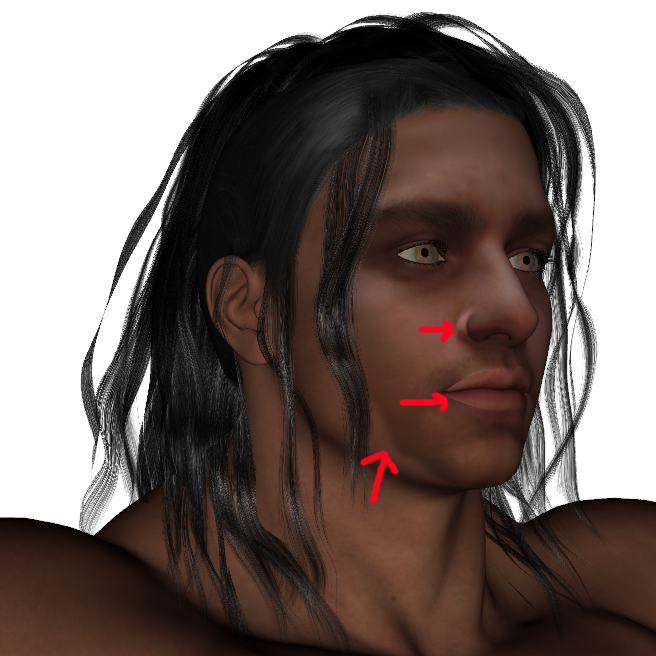
Here the foto of KingShan after adjusting the points.
Hier das Foto von King Shan nach dem Justieren der Punkte. Mit der Maus einfach an die richtige Stelle ziehen.
you will get this result you see on the right pic:
Das Ergebnis erscheint dann auf dem rechten Bild:
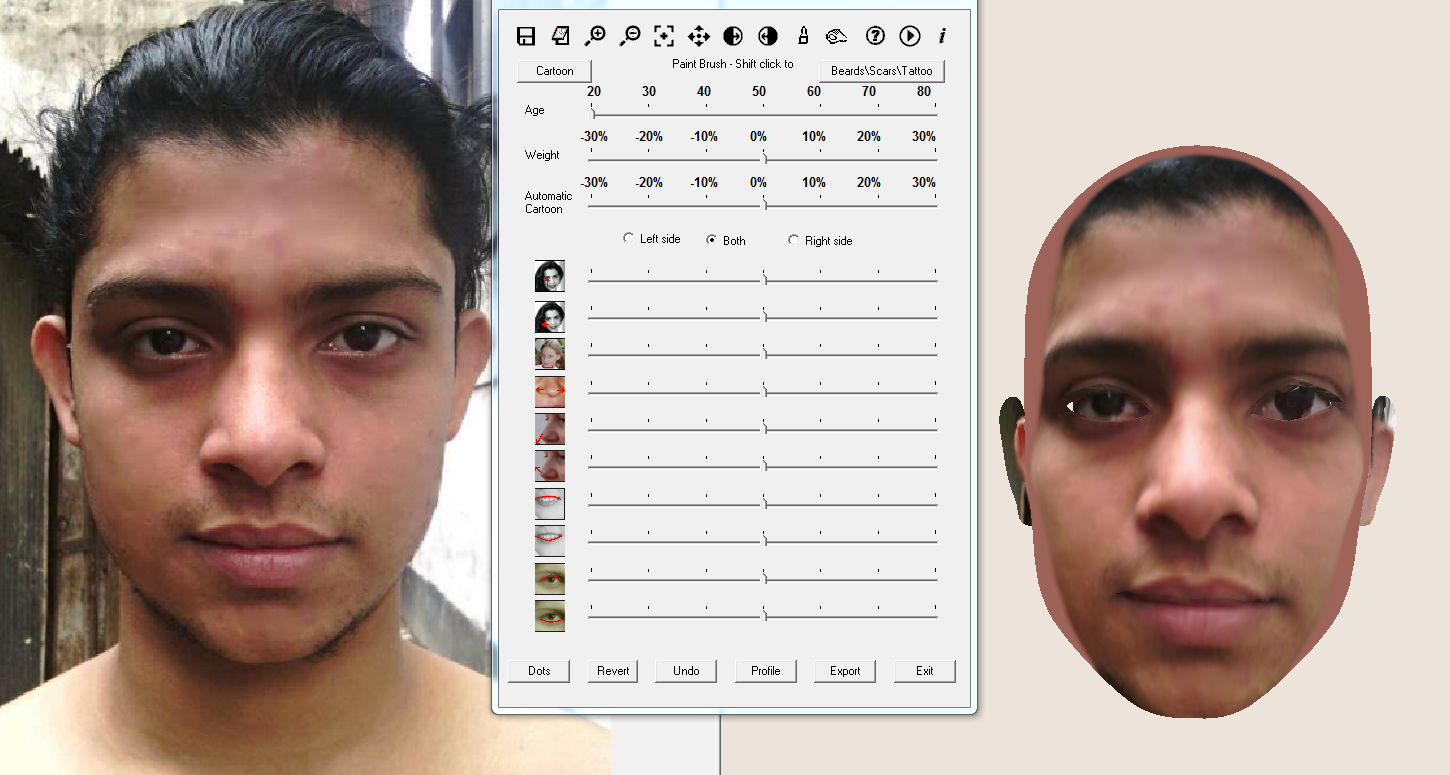
This is really what we get. Now you see why we need photoshop or
something similar.
Das ist wirklich das, was wir hier bekommen. Nur eine Maske der
Vorderseite des Gesichtes. Jetzt wird klar, warum wir noch Photoshop
oder ein ähnliches Programm brauchen.
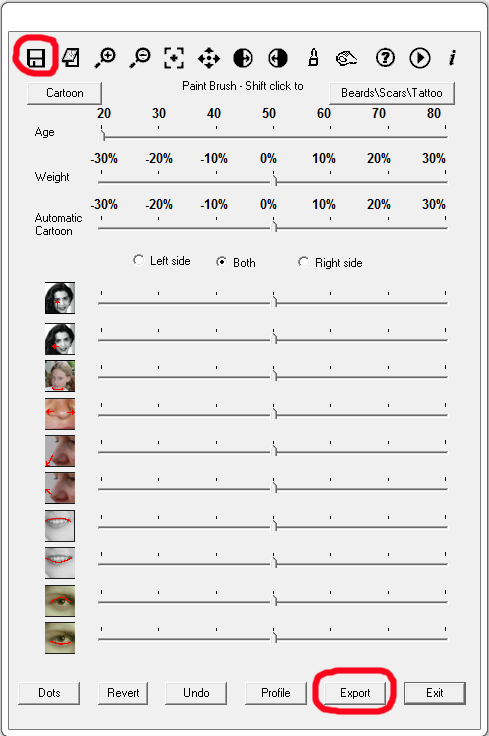
Next pic you can do some little corrections. You should save your file
here. This saves the whole pic incl. "points".
Hier sollte das File gespeichert werden. Auch die Punkte werden
gespeichert. Es ist allerdings mühsam, das Ding wieder zu laden.
I ignored the following possibilities here, but i should have done the
nose adjustments as we can see later ...
Click on export then.
Leider habe ich hier den Fehler gemacht, die Nase nicht zu korrigieren. Das sehen wir später noch. Auf Export klicken.
First the obj-file is saved. I don't need this.
Das obj-File brauchen wir nicht wirklich. Aber besser speichern.

Then the most important
file, the texture for the face is saved. That
is the file we need!
Dann wird die Textur gespeichert. Das ist die Datei, die wir brauchen!
That is all we need to do in Faceshop. Rest we will do in DAZ and a
program like Photoshop. I use here version CS 5.5 because i will not
support Adobes user-unfriendly price strategy.
Das ist alles, was wir in FS tun können und müssen. Den Rest
machen wir in DAZ und einem Grafikprogramm. Ich nutze hier noch die
alte CS 5.5 Version von Photoshop, wegen dem Nutzerunfreundlichen
Preismodell von Adobe :-(
Now comes the difficult part of our operation: We have to edit the
generated facemap in our graphic-program.
Jetzt kommt der schwierige Teil: Wir müssen die Gesichtstextur im Grafikprogramm bearbeiten.
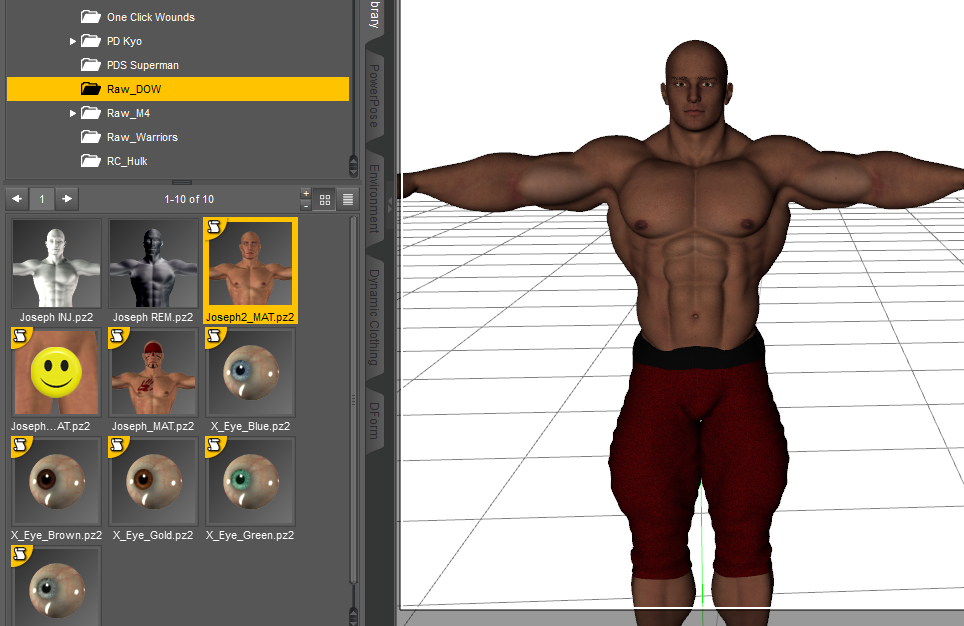
First we have to find a skin for M4 that is most compatible with the
skin of the face. After a long try and error i found the Raw_DOW Joseph
skin for M4 i apply on M4:
Als erstes brauchen wir eine Hauttextur von M4, die der Gesichtsfarbe
recht ähnlich ist. Schließlich habe ich hier Raw_DOW Joseph
gefunden. Nachdem es für M4 aber massenhaft Texturen gibt, sollte
sich schon eine richtige finden lassen.
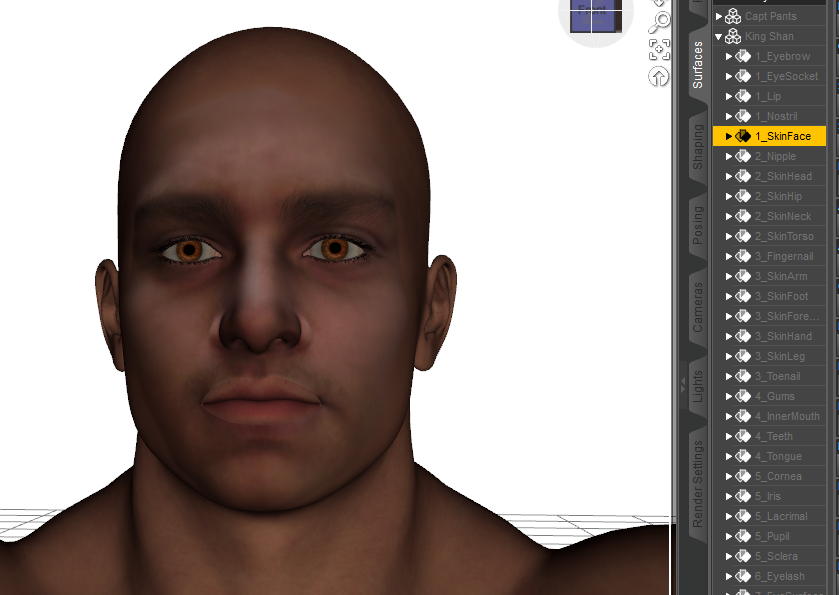
We apply the new face in the surface-tab, in the Diffuse-color-field.
We choose only "1_SkinFace", not the whole M4-body.
Wir applizieren die erstellte Gesichtstextur im Surface-Tab im
Diffuse-Feld. Darauf achten, dass wir nur die SkinFace-Textur nehmen.
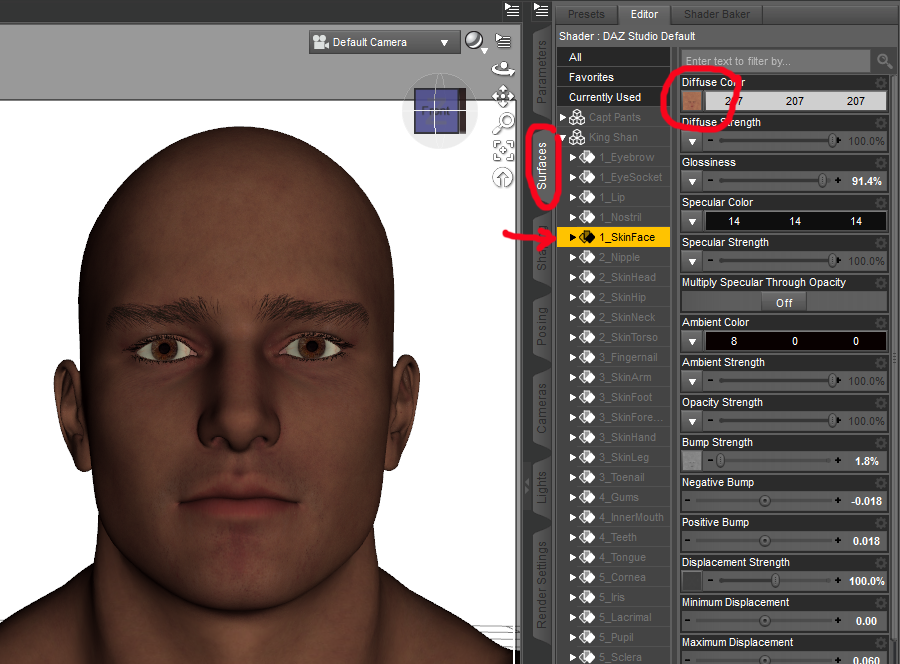
After applying the skinface you see something ugly like this:
Nach dem Applizieren sieht man folgendes hässliche Bild:
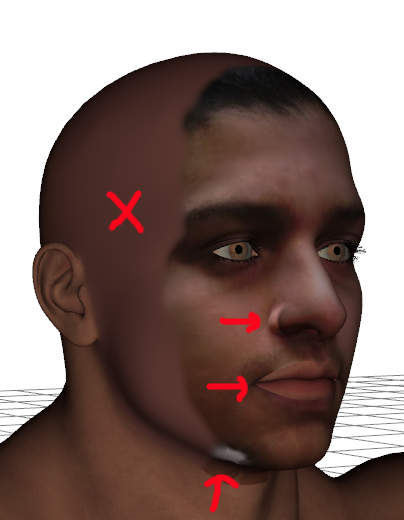
This is because FS only makes the map of the front-face.
- the nose is why we should use the adjustments i told before, but i
forgot. It is not important if we don't make a render of the face in
close-up view ...
- same problem with mouth. Mouth is, even like the eyes, a hole that
let us see the original-face from M4 so that we can change some parts
of the face furthermore.
- other problems we will remove in photoshop now.
Hier sehen wir noch einige Fehler: Die Nase hätten wir vorher
besser etwas korrigieren müssen, aber wir hätten eh nicht
gewusst wie. Das macht aber nur bei Nahaufnahmen Probleme.
Mund und Augen werden ja quasi ausgeschnitten. Da können wir u.U.
später noch etwas korrigieren. Macht im Moment aber nichts aus.
Lösen wir alles später in Photoshop.
For this we first search the original-facemap of our choosen
skin-texture in the texture-folder becasue we want to use it as a layer:
Jetzt müssen wir die Original-Facemap der Hauttextur, die wir
vorhin ausgesucht haben im runtime\textures-Ordner finden und in
Photoshop laden (als Layer). Besser eine Kopie vorher machen.
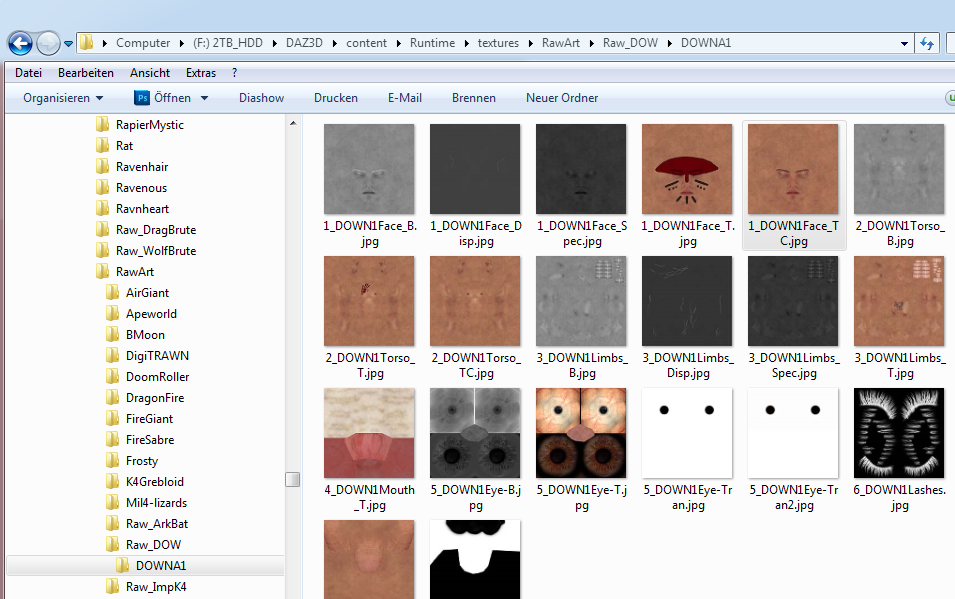
I choose the file 1DOWN1Face_TC.jpg. This file is 4000x4000. I copied
it to the folder where the FS-Files are located and sizeed the copy to
1024x1024 or what you have choosen here.
It must be the same size like the new Faceshop-skin. See here again:
Wir kopieren dazu die Textur in den Bearbeitungsordner für das
Gesichtsprojekt und verkleinern diese Kopie auf 1024 x 1024. Beide
Texturen müssen die selbe Größe haben.
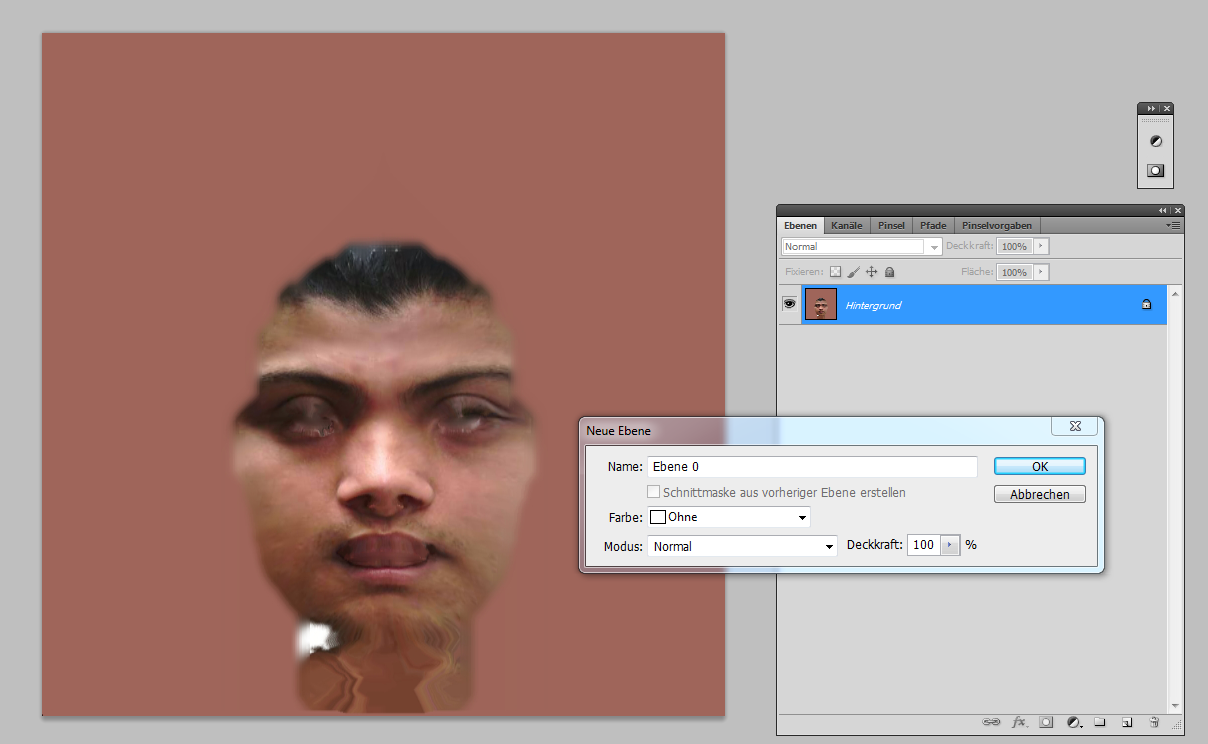
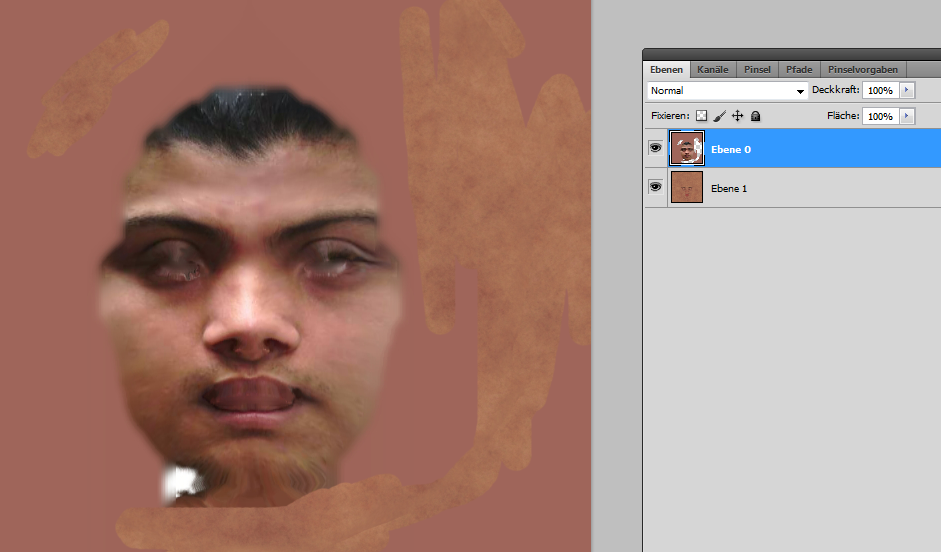
When we load the mask (it is located in the folder where you have saved
the original pic) in PS, the file is loaded as a background
("Hintergrund" - i have a german version here)
and we have to transform it to a new layer ("Neue Ebene") (right
mouse-click). You can
call the layer-menue with F7 on PC.
Wir laden die erstellte Gesichtsmaske in Photoshop. Da sie als
Hintergrund geladen wird, machen wir mit F7 eine eigene Ebene draus.
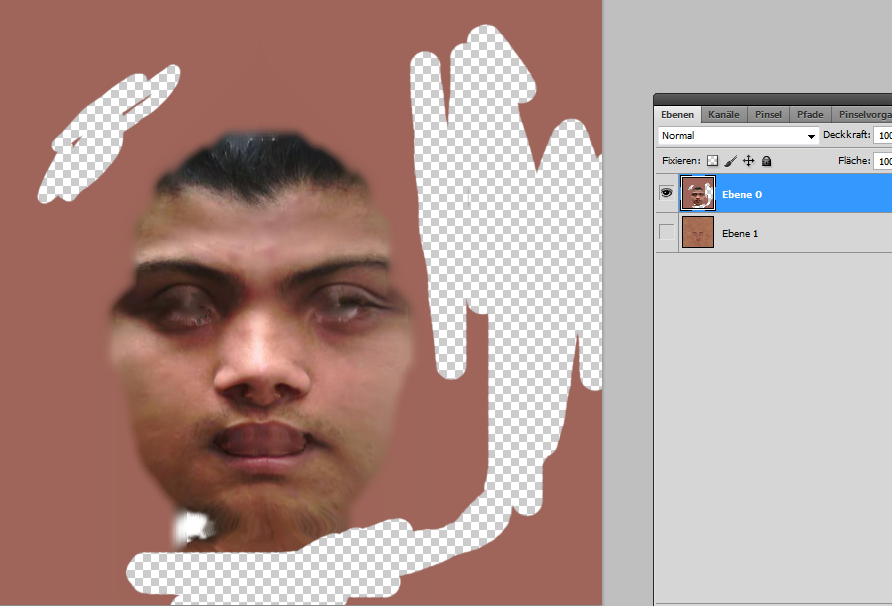
Now we load the resized copy from the face of RAW-DOW Joseph, copy it to a new
layer on the FS-mask and select the layer with the FS-mask.
We delete with the rubber-tools all wrong colors aroud the face. This works only in a layer, NOT
in a background!!!
Jetzt laden wir die angepasste Gesichtstextur von RAW-DOW Joseph (oder andere) in einen neuen Layer und markieren diesen Layer.
Dann entfernen wir mit dem Radiergummi alle Falschfarben um das
Gesicht. Das geht nur in einem Layer, nicht in einem Hintergrund.
Deshalb die Umwandlung.
Attention: it
is very important that you don't change place of the face or size of
the file in photoshop.
Wichtig: Die Datei nicht verändern. Weder verrutschen, noch in der
Größe. Die beiden Ebenen müssen genau übereinnader
liegen, da es sonst Verrutschungsprobleme gibt.
Otherwise you will get problems with applying the face on the correct
location.
(if you made a mistake here you can change the offset in the surface
tab in DAZ to correct this)
Man kann hier zwar im Offset von DAZ etwas manipulieren, aber besser ist es, hier aufzupassen.
When we make the "Joseph"- Layer visible, we get something like this:
Wenn wir die "Joseph"-Ebene sichtbar machen erhalten wir sowas wie das hier:
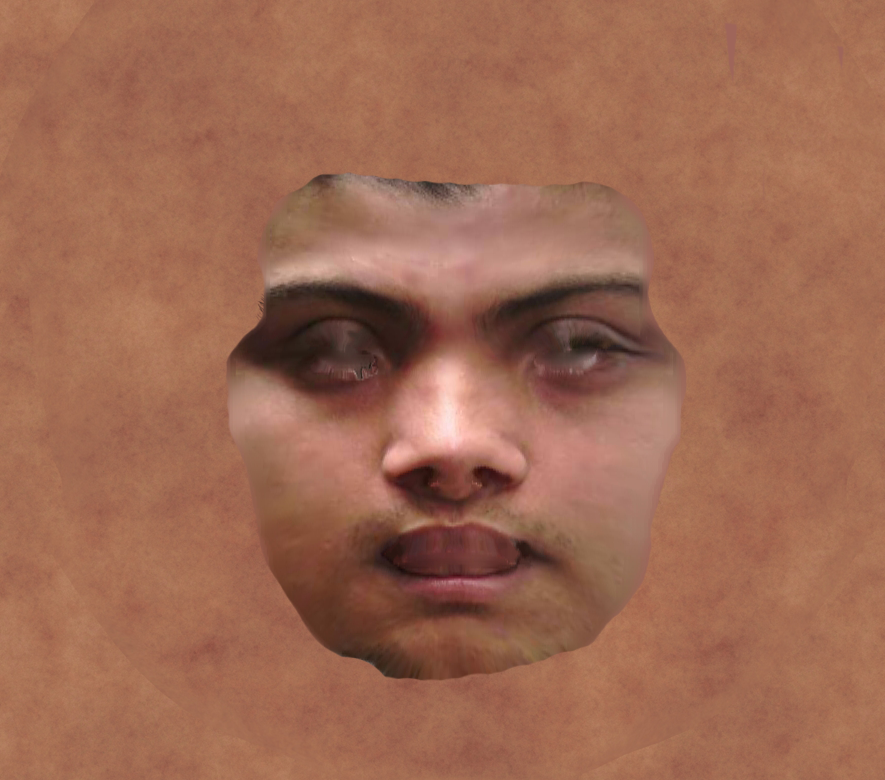
You see the hard borders around the face. Don't worry about the eyes
and the mouth. Both will disappear later.
Lets take the bluring-tool:
Da sind immer noch harte Ränder um das Gesicht. Keine Sorge
wegen der Augen und dem Mund. Die verschwinden später.
Jetzt wählen wir das Verwischen-Tool.

first results, but not really good:
Schaut schon ganz gut aus:
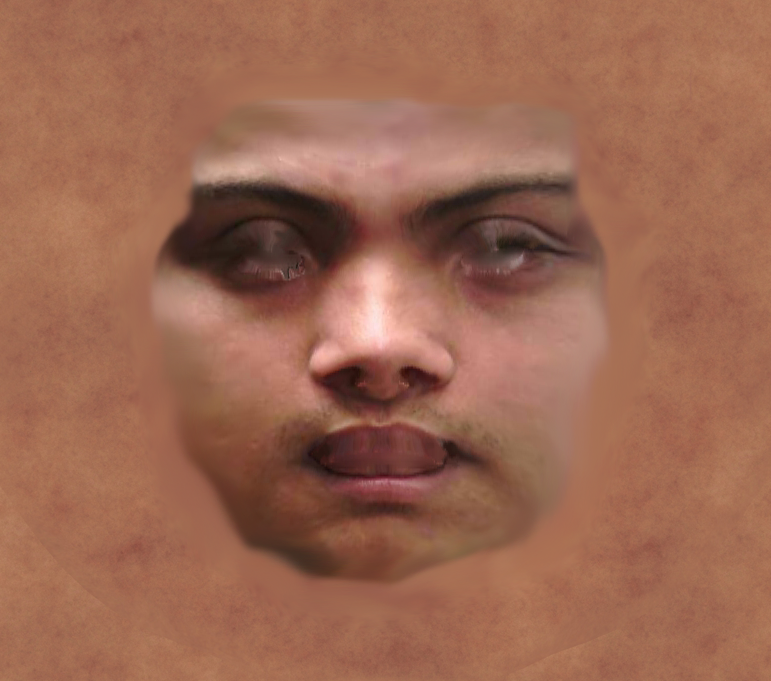
when you load this mask in DAZ Surface-Tab you will get something like this:
Wenn wir jetzt diese Maske als jpg exportieren und in DAZ im Surface-Tab laden, sieht es momentan so aus:

It is better but still not perfect. Now you see why we need a skin that
is near at the skin of the face.
Schon besser wie oben, aber noch nicht ganz korrekt. Jetzt erkennt man
aber, warum wir eine Skin-Textur brauchen, die der Gesichtsfarbe
möglichts ähnlich ist.
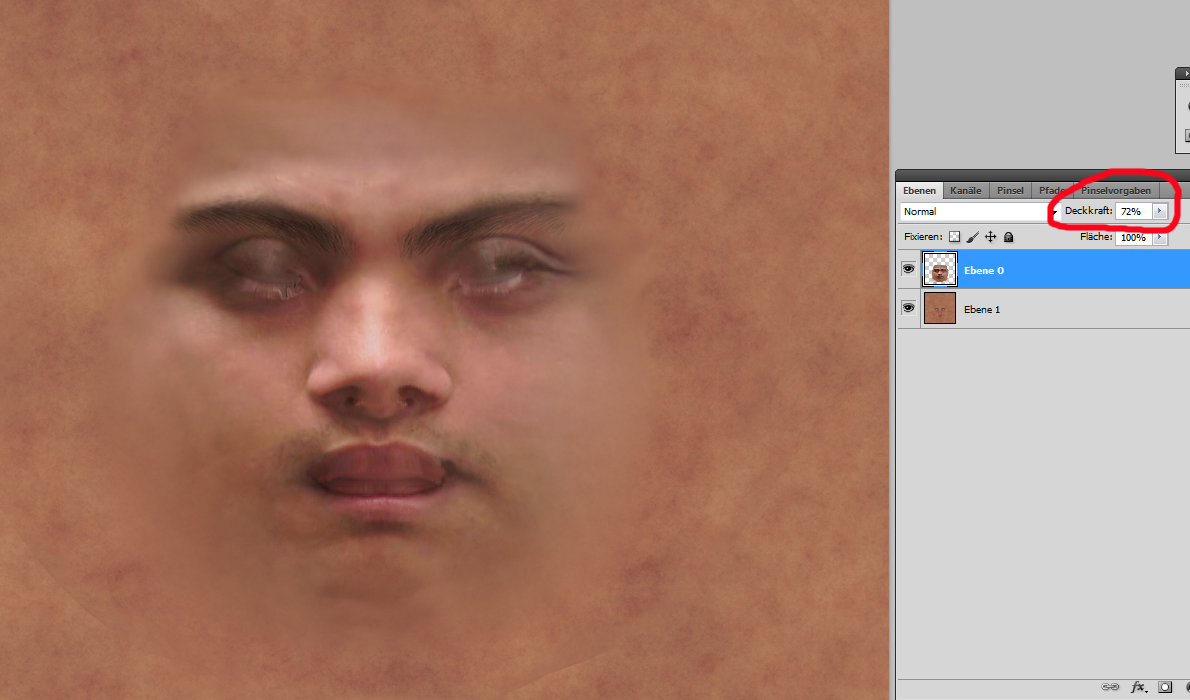
I reduced the covering
/ hiding - power of the blur-tool to 58% (try what value
will work best)
Ich spiele hier etwas mit der Deckkraft. Probieren, was hier der beste Kompromiss ist.
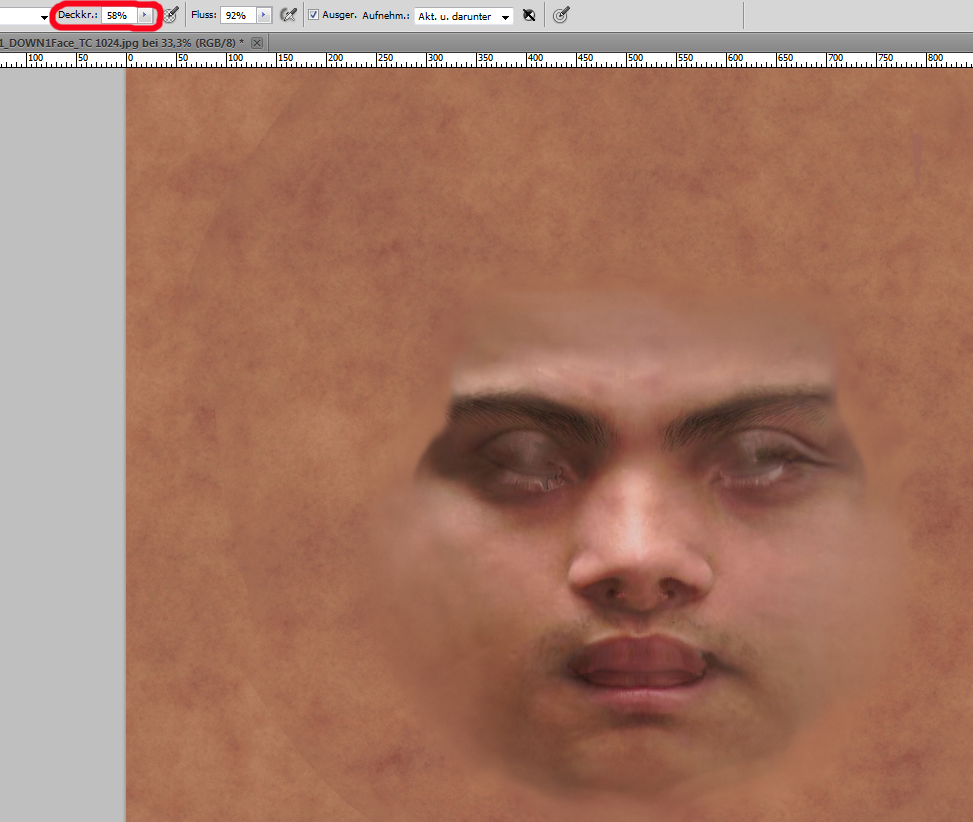
adjust the covering / hiding - power of the LAYERS to ~ 70%
Auch bei den Ebenen muss man etwas mit der Deckkraft spielen.
I got this and this is enough for the end-result:
Jetzt können wir das Ergebnis schon eher brauchen:
There are still some little problems but now i ignore them now.
If you don't make a render of the face as a main object, you can ignore
this. In a normal render it is not visible if you don't go to close to.
Long hair (here: Marc Hair) helps to hide the borders.
Es sind noch kleine Probleme vorhanden, die ich jetzt aber erstmal
ignoriere. Solange ich keine Nahaufnahme mache, ist das auch egal.
Ideal war in diesem Falle dass ich "Marc Hair" verwenden konnte. Das
verdeckt die Ränder. Meister-Propper-Typen sind hier nicht so
recht brauchbar.
Front view looks good here. You hardly see the borders.
Schaut auch von vorne gut aus. Man sieht die Ränder kaum noch.
Apply hair, clothes and other things and your figur will work. Don't
forget to save your figure as a DUF-File to your harddisk and don't
move the face-jpg to an other place.
DAZ always will search and load it when you load this figure.
Haare und Kleider und anderes Zeug drauf und fertig ist die Figur.
Speichere die Figur als DUF-File ab und lass die Gesichts-Textur am
momentanen Ort, weil DAZ sie beim Laden der Figur wieder sucht.
Here you see the end-result:
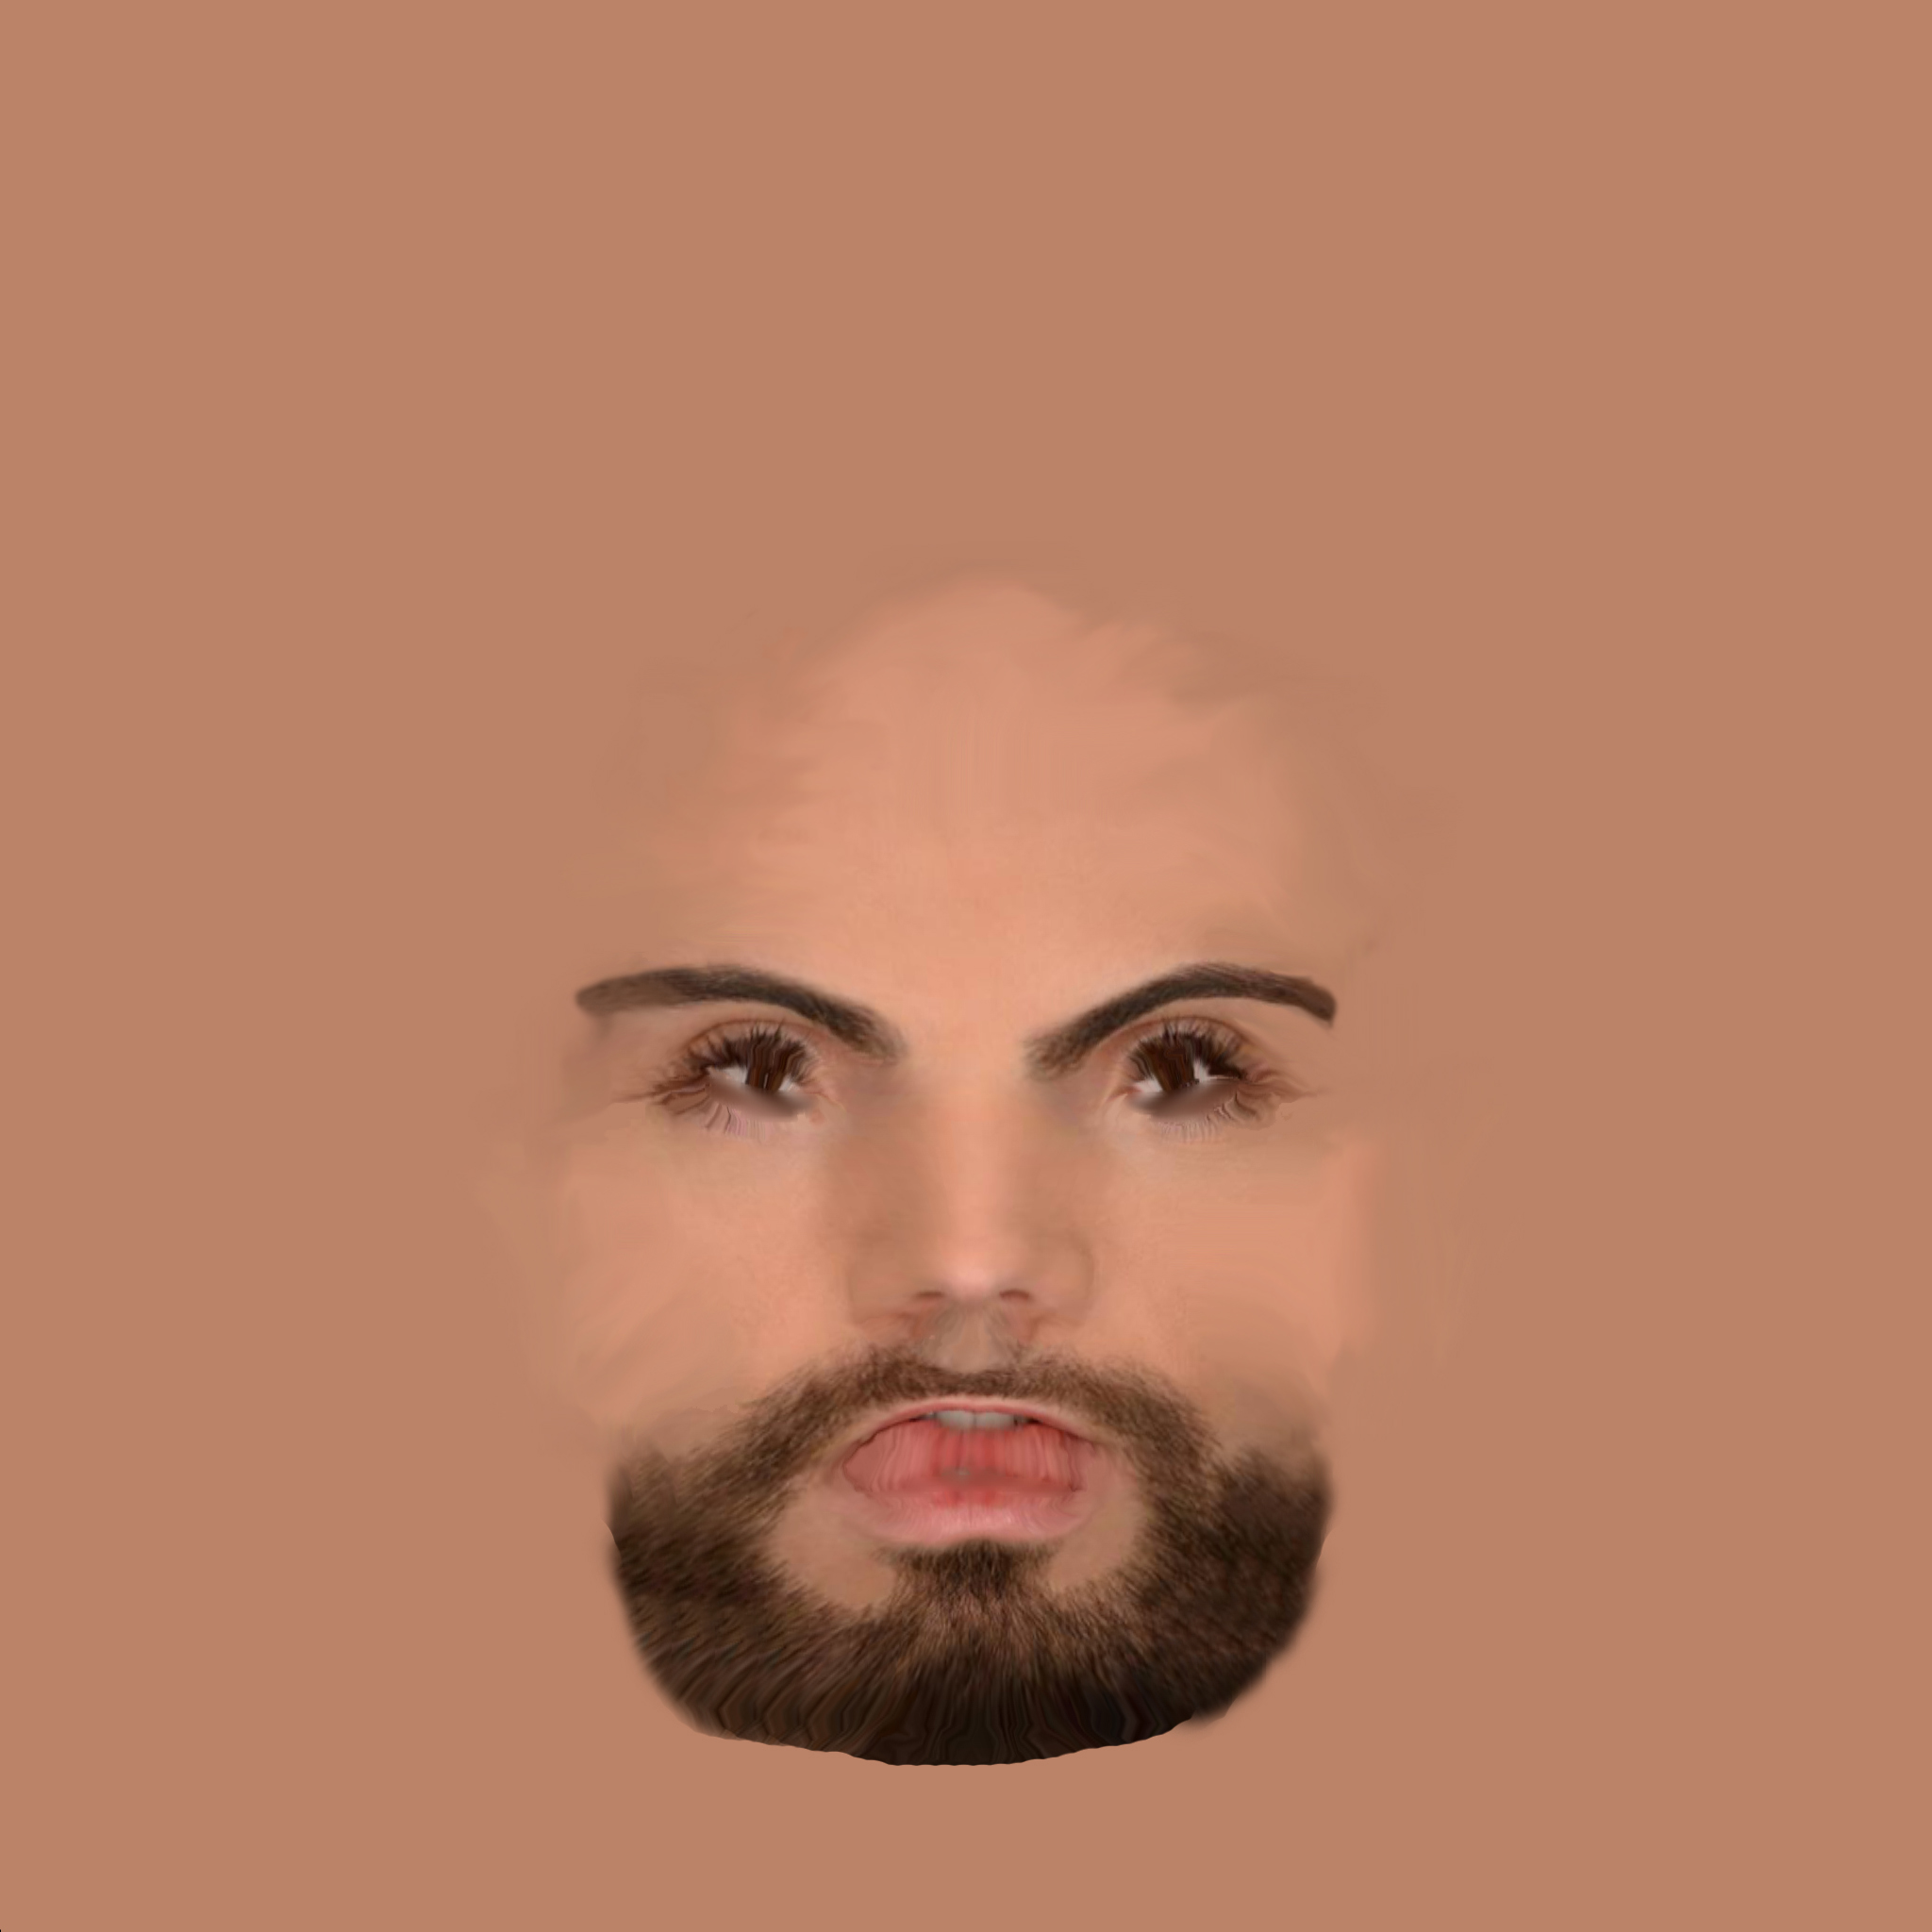
Here are 2 addional pics of an other person who has a beard.
A beard
may make it easyier to hide borders on the chin, but you need to have the appropriate version of this beard for your DAZ-Figure:
Hier mal ein Beispiel von jemanden mit Bart. Ein Bart macht es einfacher, den Übergang von Gesicht zum Hals zu verdecken.

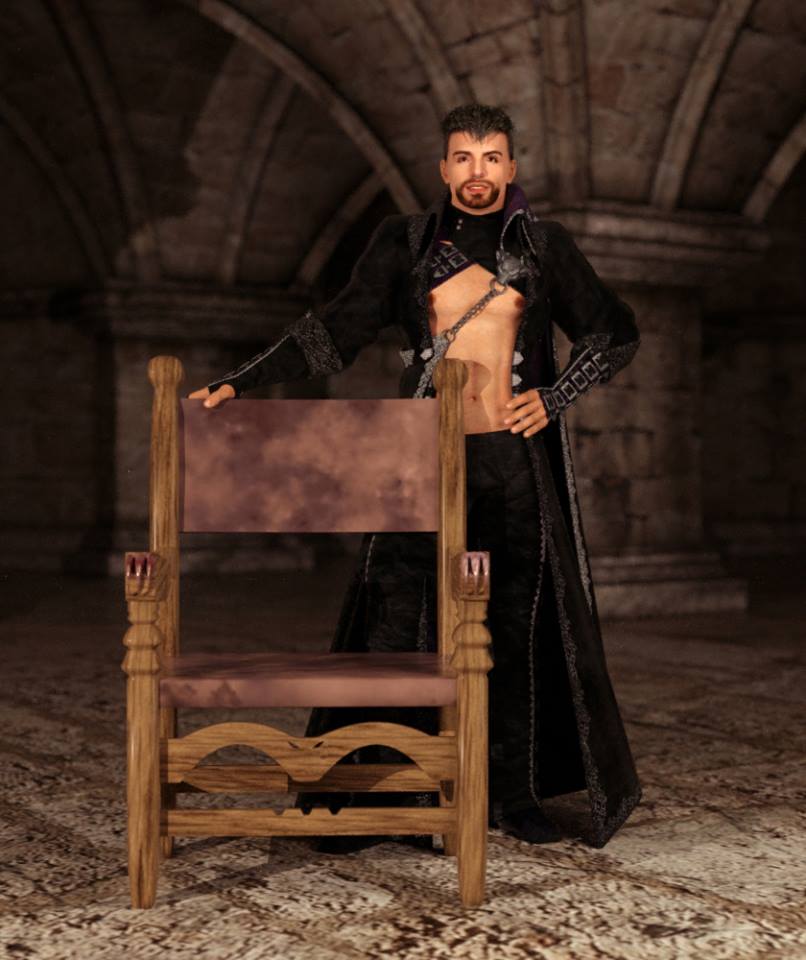
The beard in the right pic is not a DAZ - Prop or figure, it is on the original face-skin.
Hier konnte ich sogar den Original Gesichts-Bart verwenden. Der war hier sogar besser als ein zusätzlicher DAZ-Bart.
It is a wide filed of try and error, but you can get very good results
and a figure with the face from a friend makes a lot of fun :-)
Es ist oft eine Pfriemelei, Versuch und Fehler, aber ein Gesicht von
Freunden auf eine DAZ-Figur zu projizieren, ergibt viel Fun :-)
Back / Zurück
Impressum